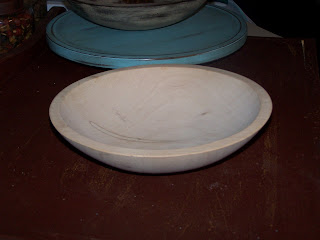
So what do you think? I really like how the robins egg blue turned out, looks a little shabby chic I think. I'm still debating on which to use for my craft table. I may just use both!
I was really bad about taking pictures throughout the process but here is what I did to each.
Both the bowl and the lazy susan were unfinished wood. Since I was just experimenting I didn't take the time to sand these before painting but I would suggest lightly sanding before you paint. Make sure to use a fine grit and sand along the grain of the wood.
Lets start with the bowl. First I slapped on a thin coat of a milk chocolate color. Once dried, I dry brushed the bowl with a creamy white color. Dry brushing gave me a more textured look and allowed me to leave some of the base color to show through. Once the paint was dry I sanded and sanded. I think I used 120 grit, which will take it off a little quicker. I sanded places that I thought one would find normal wear on an old bowl.
Once I was happy with the appearance of the bowl, I wiped it down with a dry cloth to remove any excess dust.
Now time for the messy part. I liberally applied a dark wood stain to the bowl and let it sit a few minutes. Then using a clean cloth (I used and old white t-shirt) wipe of the stain. If you want your paint to remain as close the the original color I would suggest wiping off immediately. Or, apply the stain with a q-tip or cotton ball only to the areas you want stained, leave for a few minutes and wipe clean with a dry cloth. Alternately, if you prefer a more aged look leave your stain on a few minutes longer before wiping off.
Then let your bowl air dry until no longer tacky. I decided to finish my bowl with a wax finish for protection and it adds a slight sheen and makes the stained wood look aged. My favorite is Paste Finishing Wax by Minwax. I confiscated a long sock from the hubby's sock drawer (I made sure it had a hole to justify ruining it) and buffed the wax all over the bowl.
I used the same technique for the lazy susan, except I did not paint it brown first. I used one thick coat of Rust-oleum's Ultra Cover 2x in satin aqua.


No comments:
Post a Comment